
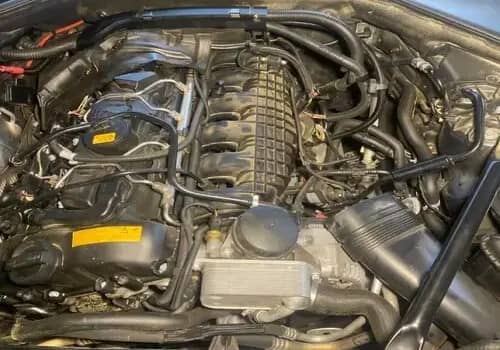
In 2006 the BMW N54 was launched in the Geneva Auto Show, and in 2007 the BMW N54 engine debuted in the USA market.
From then it has become a favorite engine of tunning enthusiasts because of its performance-boosting potential.
However, the BMW N54 engine has some flaws, one of which is the carbon buildup in the intake valve. This problem can take away the supreme performance this engine is known for.
To prevent these issues we need to clean the carbon buildup in the intake valve on a time-to-time basis.
I will always recommend you clean the intake valve every 30,000-50,000 miles. You can also use an OCC(Oil Catch Can) to prevent some of the carbon buildup, however, you still have to clean the intake valve every 70,000 miles or sooner.
N54 Intake Valve Cleaning Process
When it comes to cleaning the intake valve, there are many ways to do that. The more popular method is walnut blasting, but here we’re gonna use the DIY process, which can be performed by anyone with very minimal equipment.
So, let’s go step by step process of cleaning the BMW N54 intake valve:-
Tools Needed
- Brass Wire Brushes
- B12 Chemtool Cleaner (Intake valve cleaning solution)
- Wet/Dry Vaccum cleaner
- Flat-head Screw Driver
- Multiple Shop towels
- Gloves and safety glasses
- Air Compressor (helpful if you have)
- Spark Plug Remover
- Break Parts Cleaners
Step By Step Process

Step 1: Get Ready
First, get ready to dedicate yourself some time to go through the process step by step. Gather all your tools and wear your safety glasses and gloves.
Step 2: Remove Engine Cover
Now disassemble the top engine Cabin Air Filters and remove the Sway-Bar Mounts. After that, you can remove the engine cover which can be done by removing the 4 bolts, 2 in the front and 2 in the rear.
Step 3: Remove Air Intake System
After removing the engine cover disassemble the air intake system, remember you must remove the full Airbox.
Now remove the intake manifold clip, and then the charge Pipe (CP). Before removing the Charge Pipe first unclip the CP.
Step 4: Remove the Spark Plugs
Now remove the spark plugs using a spark plug removing tool.
Also Read: BMW N52 Reliability: The Great Natural Aspirated Engine
Step 5: Check the Intake Valves
Before starting the cleaning process make sure to check which intake valves are open and which ones are closed. Mainly 2 or 3 valves stay closed and others stay open.
Check them carefully using a torch light.
Step 6: Spray The Cleaner
After finding the closed intake valves spray the B12 Chemtool Cleaner and fill the intake valve. Let the cleaner break down the carbon deposits into little chunks, which gonna take about 10-20 minutes. But I like to wait for 30 minutes and in the meantime, I use a flat-head screwdriver to scrap off the carbons that are on the front of the intake runners.
Step 7: Rubb It Off
After 30 minutes take the brass wire brush, and scrub all the carbons in the intake valves. Try to scrub off as much carbon as you can or for as long as you can to clean off the big deposits.
And, remember while performing these methods, use shop towels to cover the open valves because we don’t want any cleaner or other things to go into the transmission.
Step 8: Vaccum
Now suck the carbon cleaner with a wet/dry vacuum cleaner. To make the process smoother mix the carbon cleaner with some water and then suck it out. Use a different type of tubing if your vacuum doesn’t fit into the intake valve.
After taking out all the cleaner and devolved carbons, you’ll still see many big chunks at the bottom of the intake valve. Now, you can use a flat-head to clean it up properly, because the carbon cleaner has already made the carbon softer.
Step 9: Air Compressor
Now spray the Break Parts Cleaners to melt down the remaining carbons and make a polished finish.
Use the air compressor and the vacuum cleaner, the same as used like dentists used with the water spray and suction method.
Use the air compressor at a moderate power to break down the hard carbons and the vacuum should collect the derbies accordingly.
Perform this method, for quite some time until you can see that all the carbon deposits are cleaned up. To give a finished touch spray some Break Parts Cleaners and then wrap the flat-head screwdriver with a clean towel and clean all the sprays and remaining little carbons with it.
Step 10: Repeat The Same
Repeat steps 6 to 9 as many as you want until you get the perfect cleaned intake valve.
Now, you have the close the other 2-3 open valves and perform the same steps, mentioned above.
To close the other intake valves, there are two ways you can perform, which are-
- Just start the engine with the ignition button(while keeping your foot on the brake), and stop the engine suddenly which will change the valve position and hopefully, you’ll get the open valve closed.
- Another good way is to lift your car and remove the radiator fan it’ll make it easy to reach the crankshaft which is located inside of the pulley belt. Now manually use a wrench to move the crank, which will open or close the intake valves. look for which valves you want to be open/closed and do it accordingly.
Also Read: Used BMW Engines: Are They Worth It?
Step 11: Reinstall Everything
After cleaning all the intake valves, it’s time to reinstall the spark plugs, air intake system, charge pipe, and engine cover. While reinstalling all the components be careful not to forget or mismatch any wiring or component.

Step 12: Testing
After putting all the things back, start the engine and keep the engine start for a few minutes, it will burn any cleaner portion left. Now take it for a ride and check the improved throttle response and overall power performance.
Finally, congrats you just completed a tough DIY BMW N54 intake valve cleaning process.
Conclusion
Continuous maintenance of the BMW N54 engine is very important to maintain the performance and agility of the N54 engine. By performing this DIY method, you can easily clean your intake valve on a recommended time basis. But, if you are not a DIY type of guy or you don’t want to take any risks with your engine then you can always seek professional help.
You can opt for a walnut blasting by a professional technician or a full cleaning of the intake valve. If you are having any problems with this DIY or have any questions or suggestions feel free to comment below.
Image Credit: Youtube (The Bimmer Barn), e90post
FAQ
Yes, it is very necessary to clean the intake valve cleaning, because it is directly linked to your BMW performance & reliability. By simply cleaning the intake valve you can easily avoid many mechanical issues.
The common symptom of a dirty intake valve is your BMW running pretty rough, reduced engine performance, Misfiring & stalling when it is cold.
When the intakes get pretty dirty with carbon buildup you’ll see slow response from the engine, less power output & overall reduced engine performance. So, it’s always best to clean the intakes on a timely basis.
Yup, you can clean the intake valves. There are multiple ways to clean the intake valves, like using specialized cleaning solutions, manual cleaning, or media blasting.
Related Posts:
What BMW Models Has the N52 Engine?
8 Most Common BMW N52 Engine Problems


Pingback: Used BMW Engines: Are They Worth It? - Auto MotorX